# User Settings
You can find important account details, text editor configuration, and more in your User Settings (opens new window).
# Account
You'll find your Pipedream email and other basic account details in your Account Settings (opens new window).
# Changing your email
Pipedream sends system emails to the email address tied to your Pipedream login. You can change the email address to which these emails are delivered by modifying the Email in your Account Settings. Once changed, an email will be delivered to the new address requesting you verify it.
Pipedream marketing emails may still be sent to the original email address you used when signing up for Pipedream. To change the email address tied to marketing emails, please reach out to our team (opens new window).
# Two-Factor Authentication
Two-factor authentication (2FA) adds an additional layer of security for your Pipedream account and is recommended for all users.
# Configuring 2FA
- Open your Account Settings (opens new window)
- Click Configure under Two-Factor Authentication
- Scan the QR code in an authenticator app like 1Password (opens new window) or Google Authenticator (available on iOS (opens new window) and Android (opens new window))
- If you're unable to scan the QR code, you can view the setup key to configure 2FA manually in your authenticator app
- Enter the one-time-password (OTP) from your authenticator app
- Save your recovery codes in a secure location. You'll need these to access your Pipedream account in the case you lose access to your authenticator app.
Save your recovery codes
If you lose access to your authenticator app and your recovery codes, you will permanently lose access to your Pipedream account. Pipedream Support cannot recover these accounts.
# Signing in with 2FA
- You'll be prompted to enter your OTP the next time you sign in to Pipedream
- When prompted, you can enter the OTP from your authenticator app or a recovery code
Using recovery codes
Each recovery code is a one-time-use code, so make sure to generate new recovery codes in your Account Settings (opens new window) when you need to. All previously generated recovery codes expire when you generate new ones.
# Pipedream API Key
Pipedream provides a REST API for interacting with Pipedream programmatically. You'll find your API key here, which you use to authorize requests to the API.
You can revoke and regenerate your API key from here at any time.
# Delete Account
You can delete your Pipedream account at any time by visiting your Account Settings and pressing the Delete your Account button. Account deletion is immediately and irreversible.
# Application
You can change how the Pipedream app displays data, and basic text editor config, in your Application Settings (opens new window).
For example, you can:
- Change the clock format to 12-hour or 24-hour mode
- Enable Vim keyboard shortcuts in the Pipedream text editor, or enable word wrap
- Set the number of spaces that will be added in the editor when pressing
Tab
# Environment Variables
Environment variables allow you to securely store secrets or other config values that you can access in Pipedream workflows via process.env. Read more about environment variables here.
# Billing and Usage
You'll find information on your usage data (for specific Pipedream limits) in your Billing Settings (opens new window). You can also upgrade to paid plans (opens new window) from this page.
# Subscription
You can upgrade to paid plans (opens new window) from this section.
If you've already upgraded, you'll see an option to Manage Subscription here, which directs you to your personal Stripe portal. Here, you can change your payment method, review the details of previous invoices, and more.
# Usage
Credits are Pipedream's billable unit, and users on the free tier are limited on the number of daily free credits allocated. The Usage section displays a chart of the daily credits across a historical range of time to provide insight into your usage patterns.
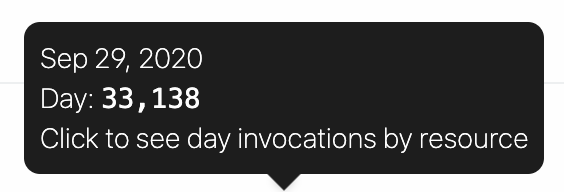
Hover over a specific column in the chart to see the number of credits run for that specific day:

Click on a specific column to see credits for that day, broken out by workflow / source:

Users on the free tier will see the last 30 days of usage in this chart. Users on paid plans (opens new window) will see the cumulative usage tied to their current billing period.
# Compute Budget
Control the maximum number of compute credits permitted on your account with an Credit Budget.
This will restrict your account-wide usage to the specified number of credits on a monthly or daily basis. The compute budget does not apply to credits incurred by dedicated workers.
To enable this feature, click on the toggle and define your maximum number of credits in the period.
TIP
Due to how credits are accrued, there may be cases where your credit usage may slightly go over the cap.
In an example scenario, with cap set at 20 credits and long running workflow that uses 10 credits per run; it's possible that two concurrent events trigger the workflow, and the cap will won't apply until after the concurrent events are processed.
# Limits
For users on the Free tier, this section displays your usage towards your credits quota for the current UTC day.
